|
Barry describes how he individulalised
his TITCH:
The only real decisions needed when
assembling the kit, is which side the driver is to face, and
what couplings to use. The kit is really a joy to assemble with
little or no fettling of parts required, the only thing that
I had to do was remove a small portion off of the chassis ends
(the plastic bit), to get the chassis to fit snugly between the
inside of the bufferbeams. The handbrake lever is molded to produce
a loco with the driver facing to the left when viewed from the
rear, I decided to have the driver sitting facing to the right
as I somehow thought it looked better (to me). The handbrake
lever was cut off flush with the top of the bracket and turned
over to point to the right of the loco. I added a small piece
of brass to the top of the lever to continue the molding all
the way round as the handle is now back to front. I took the
decision to glue the handbrake lever flush to the rear of the
transmission/seat as it was not attached to the base anymore.
At this point the loco can be considered ready for painting and
putting into service, and you will not be disappointed with its
looks or level of detail.
I spent a couple of days thinking about the loco and where it
was going to be used, and decided to add some extra details.
I drilled out the indent in the bottom of the radiator molding
and inserted a short length of brass tubing, that I had thinned
down the wall of in the lathe, as a bearing for a starting handle.
I bent up a short length of brass rod, flattened the end a bit
and this became the starting handle. I made up a bracket out
of brass to act as a hook and glued this to the side of the engine
compartment, and also affixed a short piece of brass to the running
plate to act as a bracket, these become the storage place for
the starting handle. Logic then dictates (in the place we consider
real life) that if you have a manually crancked engine, you need
the room to use the cranking handle. If the loco is coupled to
a wagon, or is front on to a stationary object, you will need
to move either the loco or the wagon. With it's plate frames
and two cylinder diesel engine, the loco is going to weigh around
a ton give or take (the weight of a small car), possible to push,
but not easy. The answer is pinch bars, solid steel, heavy, with
a cranked foot, used by millions of workers to shift heavy items
of machinery or equipment, I used to use them on a daily basis
at one time. The foot can be placed against the wheel tread of
a wagon, and with the leverage of the bar, very heavy weights
can be moved fairly easilly. The real question was, where to
store one on the loco. In the end I fitted two, one each side,
as I found that just having one created a lop-sided look to the
loco. The brackets are made from strips of brass, the kind of
strips you get left over from an etched brass fret, bent to shape
and glued to the frames. I thought about modelling them as riveted
or bolted, but decided that if I was fitting these to a real
loco, I would weld them. The pinch bars are made from 2mm diameter
steel welding rod that has one end hammered flat, and once flattened
the end trued up with a file and bent with a pair of pliers to
create the foot.
|
The clutch pedal was a headache, there
was not enough room on the footplate to fit one that came up
through it. I decided that the place to fit one was by bringing
a bar out of the back of the engine compartment and bent at right
angles to bring it away from the transmission housing. I drilled
a small hole in the back of the engine comparment, bent up a
piece of brass rod, added a biece of brass tube to act as a bearing
and fitted in place. The clutch pedal was designed and fitted
AFTER I had decided on a driver figure, I had to make sure that
the driver would still fit where I wanted it to, and that it
looked as if the pedal could be operated.
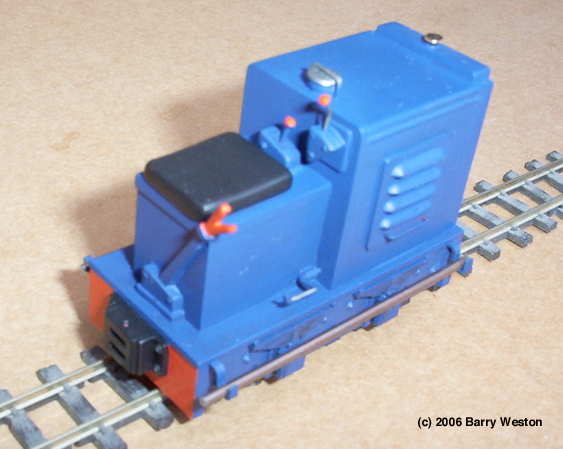
The model was then washed, dried, and primed with Halfords Red
Oxide Acrylic Primer. The colour chosen for the loco is Regal
Blue (61.32) from the Citadel Colour range of acrylics, this
was brush painted on. The buffer beams, handbrake lever handle,
the starting handle, gear lever knob, and throttle lever knob,
were picked out in red. The buffers were painted black, and the
lid of the fuel filler cap and the top of the clutch "pedal"
were picked out in Boltgun Metal (61.57) also from the Citadel
Colours range.
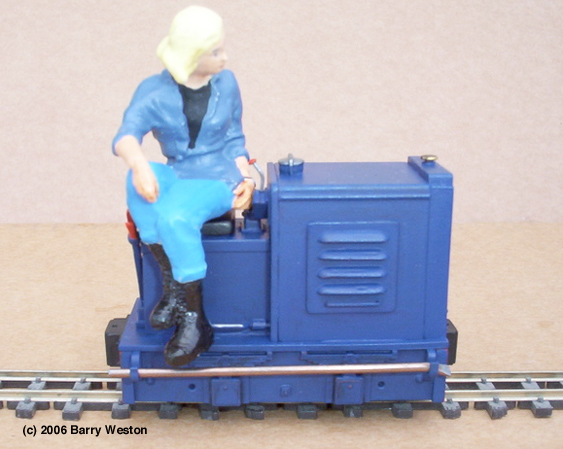
The driver is a figure from the Pola range and can be found in
the "Six sitting persons" pack (331827). Straight out
of the box her attire is unsuitable for a driver, but with new
boots molded from milliput, removal of some mold lines, a new
colour for her jacket, and some facial details painted on (red
lipstick included!), she looks the part.
My Titch is yet to be weathered, but will be depicted as "well
looked after", well, her driver is a woman!
Now click here
to move on to Ian Holmes' model or here
to go back to Gerry Bullocks'
|